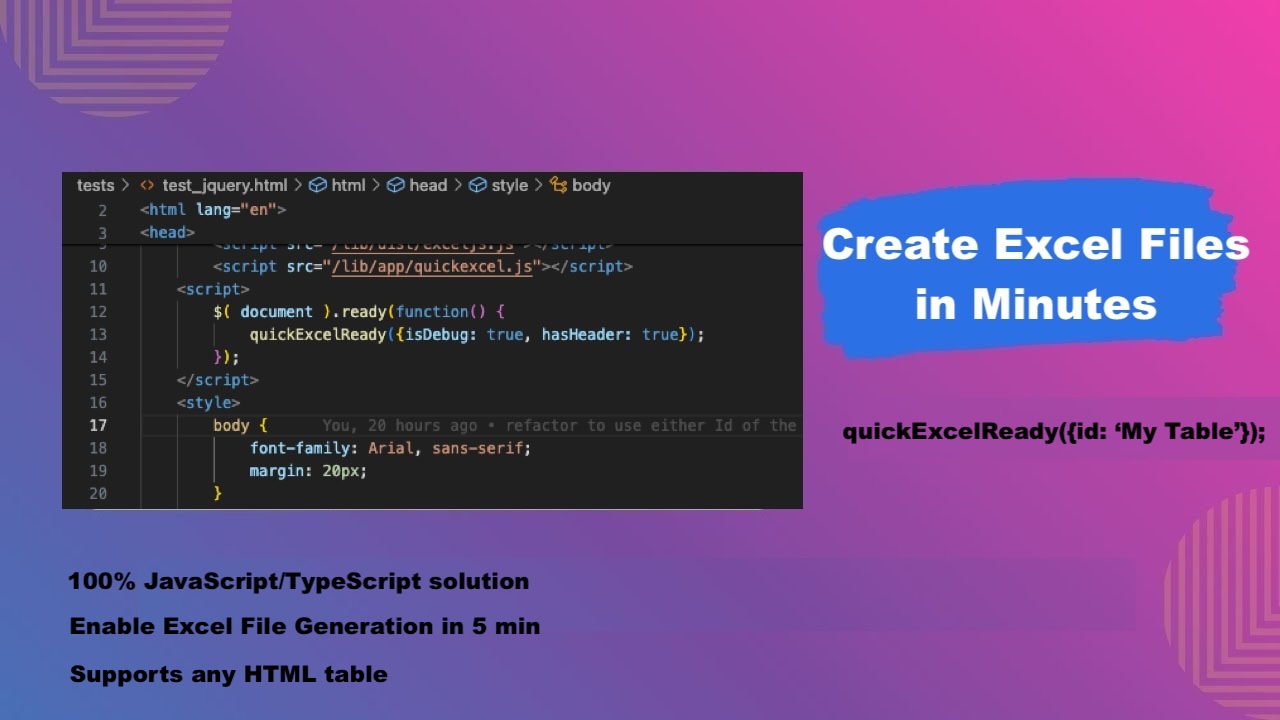
Start creating Excel Files in your app in minutes.
Create beautiful Excel files using Quick Excel Download in minutes. Add links, images, tables to your Excel files without doing any coding.


Create beautiful Excel files using Quick Excel Download in minutes. Add links, images, tables to your Excel files without doing any coding.

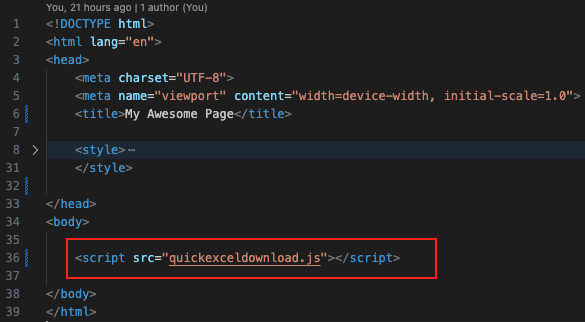
Include the library on your page.

Make sure you have at least one HTML table defined in your page. An HTML table code looks as following:
      <table class="mytable">
      <thead>
          <tr>
              <th>Product Name</th>
              <th>Customer Name</th>
              <th>Sales Amount</th>
              <th>Phone Number</th>
          </tr>
      </thead>
      <tbody>
          <tr>
              <td>XYZ Smartwatch</td>
              <td>John Doe</td>
              <td>$299.99</td>
              <td>(123) 456-7890</td>
          </tr>
      </tbody>
      </table>
If you're using JQuery, put the following code in document.ready method to initialize Excel Download for all tables on the page:
      $( document ).ready(function() {
        //initialize Quick Excel Download button for all tables on the page.
        quickExcelReady({hasHeader: true});
      });
Using plain JavaScript (no JQuery), initialize the library via the onLoad method.
Create a new function that will be called when DOM is ready myLoadFunction: inside the function put the initialization code:
      const myLoadFunction = () => {
        //Quick Excel Download initialization code here
      }
      const myLoadFunction = () => {
        //hasHeader = true indicates that the header will be included and derived from the HTML table
        quickExcelReady({hasHeader: true});
      }
<body onload="myLoadFunction()">

You can also specify the Id of the table in the initialization function (quickExcelReady):
  $( document ).ready(function() {
      //this will only initialize the Quick Excel Download button for the 'mytable-id' element
      quickExcelReady(
        {
          hasHeader: true,
          downloadButtonText: 'Download Excel File',
          id: 'mytable-id'
        });
  });
Reload the page and you should see the "Download Excel" button appear below your HTML tables:

Clicking the button should download an Excel file named Quick-Excel-Download.xlsx

You can easily customize how the Download Excel button appears on the page using CSS.
Add the following properties to the initialization code:
      //initialize the library. All buttons will have 'My Button' text and 'myButton' CSS class.
      quickExcelReady(
        {
          hasHeader: true,
          downloadButtonText: "My Button",
          downloadButtonClassname: "myButton"
        });
      .myButton {
        background-color: #ff7e5f;
      }

      .myButton {
          background-image: url(./images/ms-excel-icon-sm.jpg);
          background-repeat: no-repeat;
          background-position: 50% 50%;
          height: 50px;
          width: 50px;
          border: none;
      }

You can manually call the download function to create Excel files in your code.
First, you'll need to point the function to a table inside the page, either using classname or id table attribute.
Below is a sample table with a classname "mytable":
    <table class="mytable">
    <thead>
        <tr>
            <th>Product Name</th>
            <th>Customer Name</th>
            <th>Sales Amount</th>
            <th>Phone Number</th>
        </tr>
    </thead>
<button onclick="quickExcelDownloadFile(tableRef, options)">Download Excel</button>
      quickExcelDownloadFile(
        {
          //reference HTML table using class name
          table: document.getElementsByClassName('mytable')[0]
        },
      {
        //include the header (will be derived from the HTML table)
        hasHeader: true
      })
      {
        //find the table using 'mytable' classname
        table: document.getElementsByClassName('mytable')[0]
        //find the table by 'mytable' Id
        id: 'mytable'
      }
      <table id="my-table-id">
      <thead>
          <tr>
              <th>Product Name</th>
              <th>Customer Name</th>
              <th>Sales Amount</th>
              <th>Phone Number</th>
          </tr>
      </thead>
      quickExcelDownloadFile(
        {
          //locate the table using the id
          id: "my-table-id"
        },
      {
        hasHeader: true
      })
By default, the Quick Excel Download library uses HTML table headers (or the 1st row of the table); however, you can provide a custom header for your file by using the header configuration option:
  quickExcelDownloadFile(
      //id based table lookup
      {id: 'mytable-id' },
      {
          //provide a custom header (array of objects, each containing 'name' field)
          header: [{name: 'Product'}, {name: 'Name'}, {name: 'Sales Price'}, {name: 'Phone Number'}]
      }
  )
The Quick Excel Download can embed images (from HTML images) into Excel Worksheet cells.
Make sure to set includeImages configuration to true.
//initialization code (triggered on page load)
$( document ).ready(function() {
  quickExcelReady(
    {
      includeImages: true,
      hasHeader: true,
      id: 'mytable-id'
    });
});

//functional code (triggered from other parts of the app, e.g. button click)
quickExcelDownloadFile(
  {
    id: 'mytable-id'
  },
  {
    includeImages: true,
    hasHeader: true
  });
We support 60+ themes for the generated Excel table.
The default theme is TableStyleLight11 but you can change it in the options using the theme configuration key.
quickExcelDownloadFile(
  {
    //locate the table using the id
    id: "my-table-id"
  },
{
  hasHeader: true,
  //set the table theme to TableStyleMedium17
  theme: 'TableStyleMedium17'
})
For example, you can use TableStyleLight8 to make the Excel table look as following

You can use Quick Excel Download product with your custom JSON data or data service (REST).
You can set custom headers as well as provide static or dynamic data for table rows.
Table Column/Header data format:
//[{name: 'Column 1'}, {name: 'Column 2'}, {name: 'Column 3'}]
const myHeader = [
  { name: 'Product'},
  { name: 'Name'},
  { name: 'Sales'}
]
[
//row 1: ['Row 1 Column 1 value', 'Row 1 Column 2 value', 'Row 1 Column 3 value'],
//row 2: ['Row 2 Column 1 value', 'Row 2 Column 2 value', 'Row 2 Column 3 value']
const myRows = [
  ['Test Product 1', 'John Peters', 170.10], //row 1
  ['Test Product 2', 'Peter Gabe', 70.90], //row 2
  ['Test Product 3', 'Steven Force', 33.00]  //row 3
]
quickExcelDownloadFile(
    {
      data: myRows
    },
    {
      header: myHeader,
      isDebug: true
    });
Here's a quick solution how you can generate Excel files using a REST service that returns JSON data (with or without JQuery).
Create a quick button that calls the downloadExcelFile function that we're about to create.
<button class="my-button"
      onclick="downloadExcelFile()">
          Download Excel</button>
const downloadExcelFile = async () => {
  //get data from the service
  $.get('/tests/data.json', function(data, status){
    if (!data || data.length === 0) {
        console.warn('No data returned');
        return;
    }
    let productInfo = [];
    //transform data into QuickExcelDownload row format (array of arrays)
    for (let i=0;i <data.length;i++) {
        const obj = data[i];
        productInfo.push(
                [ obj.product,
                  obj.name,
                  obj.amt,
                  new Date(obj.date)
                ]);
    }
    //call the function to generate the Excel file
    //make sure the QuickExcelDownload library has been loaded / included on the page)
    quickExcelDownloadFile(
      {
        //table rows
        data: productInfo
      },
      { //header/columns
        header: [{name: 'Product'},
                  {name: 'Name'},
                  {name: 'Sales'},
                  {name: 'Date'}
                  ]
      }
      );
});
      }
/**
* Non-JQuery native XHR GET request
*/
const getXhr = (url, handler) => {
    const xhr = new XMLHttpRequest();
    xhr.open("GET", url, true);
    xhr.onload = (e) => {
        if (xhr.readyState === 4) {
            if (xhr.status === 200) {
                handler(xhr.responseType === 'json' ? xhr.responseText : JSON.parse(xhr.responseText), xhr.status);
            }
        }
    };
    xhr.onerror = (e) => { console.error(xhr.statusText); };
    xhr.send(null);
}

const downloadExcelFileNative = async () => {
  getXhr("/tests/data.json", function(data, status) {
      if (!data || data.length === 0) {
          console.warn('No data returned');
          return;
      }
      let productInfo = [];
      //transform data into QuickExcelDownload row format (array of arrays)
      for (let i=0;i<data.length;i++) {
          const obj = data[i];
          productInfo.push([obj.product,obj.name,obj.amt, new Date(obj.date)]);
      }
      quickExcelDownloadFile({ data: productInfo }, { header: [{name: 'Product'}, {name: 'Name'}, {name: 'Sales'}, {name: 'Date'}], isDebug: true});
  });
}
Does Quick Excel Download support TypeScript? The answer is, Yes! Please see our React / NPM example below to learn how to use the typed definition file. The code complies with the following definitions:
/**
  * Download Options
  * Filename: string, override name of the file
  * header: array of QuickExcelDownloadHeader, custom header/columns - see QuickExcelDownloadHeader
  * includeLinks: boolean, if true, links will be included in the Excel file
  * includeTotals: boolean, if true, total row will be included
  * hasHeader: boolean - required. If true, header will be derived from the HTML table
  * theme: string, override default theme (TableStyleLight11). See Documentation -> Themes
  * isDebug: boolean , if true, debug information will be displayed in console
  * downloadButtonText - string, override download button text
  * downloadButtonClassname - string, specify download button CSS classname
  * dataRowStartIndex - number, specificy data row start index (from the HTML table).
  */
export interface QuickExcelDownloadOptions {
  id?: string;
  fileName?: string;
  header?: QuickExcelDownloadHeader[];
  includeLinks?: boolean;
  includeTotals?: boolean;
  hasHeader: boolean;
  theme?: string;
  isDebug?: boolean;
  downloadButtonText?: '';
  downloadButtonClassname?: string;
  dataRowStartIndex?: number;
}

/**
  * Column Header Definition (name)
  */
export interface QuickExcelDownloadHeader {
  name: string;
}

/**
  * Data Reference (Table Id or Table HTML Element or JSON Rows Array)
  */
export interface QuickExcelDownloadTableRef {
  /**
    * Id of the table
    */
  id?: string;
  /**
    * Html Table Element
    */
  table?: any;
  /**
    * Data Array for Rows
    * Example: [ ['Test Product 1', 'John Peters', 170.10, new Date()] //row 1 ]
    */
  data?: [ any[] ];
}

/**
  * Sets up Download Link for All tables on the page
  * @param {*} options - QuickExcelDownloadOptions options
  */
export declare function quickExcelReady(options?: QuickExcelDownloadOptions);

/**
  * Creates an Excel file based on data table structure
  * Streams data back to the browser so user can download the file
  * @param {*} dataReference - Id or Element or JSON container { id: 'xxx', table: HtmlElement, data: data container }
  * @param {*} options - QuickExcelDownloadOptions options
  * Usage: quickExcelDownloadFile({ id: 'my-table-id' }, { hasHeader: true, isDebug: true, buttonText: 'Download Excel Now' })
  */
export declare function quickExcelDownloadFile (dataReference: QuickExcelDownloadTableRef, options?: QuickExcelDownloadOptions);
"quick-excel-download": "file:ui-lib/quick-excel-download-xxx.tgz"
              {
                "name": "my-app",
                "version": "0.1.0",
                "private": true,
                "dependencies": {
                  ...
                  "react": "^18.3.1",
                  "quick-excel-download": "file:ui-lib/quick-excel-download-0.0.1a.tgz"
                },
npm install
Include the Quick Excel Download library in your project using NPM local file reference, e.g.:
{
"name": "my-app",
"version": "0.1.0",
"private": true,
"dependencies": {
  ...
  "react": "^18.3.1",
  "quick-excel-download": "file:ui-lib/quick-excel-download-0.0.1a.tgz"
},
You can also use React Helmet and include the JS (from the distribution archive) in the header.
Once the library is installed, import the following functions from the package:
import { QuickExcelDownloadHeader, quickExcelDownloadFile } from 'quick-excel-download';
Now define a quick HTML table that will have data:
<table id="myTable">
<thead>
    <tr>
        <th>Product Name</th>
        <th>Customer Name</th>
        <th>Sales Amount</th>
        <th>Phone Number</th>
    </tr>
</thead>
<tbody>
    <tr>
        <td>HIJ Printer</td>
        <td>Jessica Taylor</td>
        <td>$149.99</td>
        <td>(901) 234-5678</td>
    </tr>
    <tr>
        <td>NOP Router</td>
        <td>Paul Anderson</td>
        <td>$89.99</td>
        <td>(012) 345-6789</td>
    </tr>
</tbody>
</table>
Next, create the download button:
<button onClick={() => quickExcelDownloadFile({id: 'myTable'}, { header: getHeader(), hasHeader: true, isDebug: true})} className={'styled-button'}>Download Excel</button>
We now need to define the getHeader function that provides a custom header for the file:
const getHeader = (): QuickExcelDownloadHeader[] => {
  return [{name: 'Product'},
          {name: 'Customer'},
          {name:'Sales'},
          {name: 'Phone'}
      ];
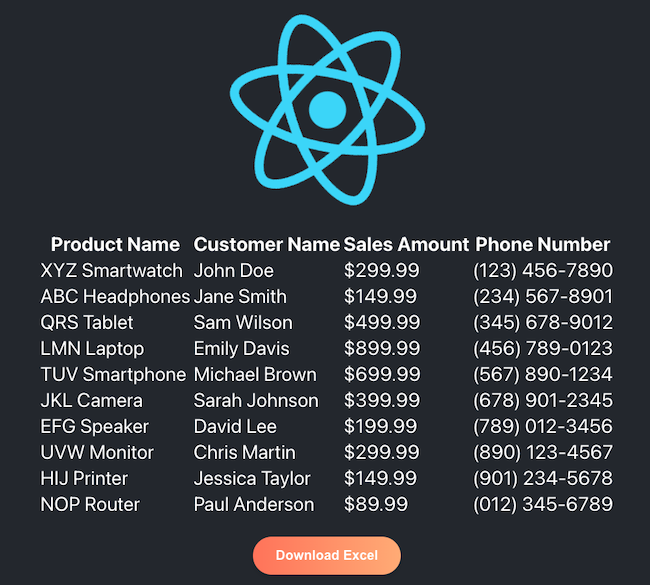
The entire demo app looks as following:
import React from 'react';
import logo from './logo.svg';
import './App.css';
import { QuickExcelDownloadHeader, quickExcelDownloadFile } from 'quick-excel-download';
function App() {
    const getHeader = (): QuickExcelDownloadHeader[] => {
        return [{name: 'Product'},
                {name: 'Customer'},
                {name:'Sales'},
                {name: 'Phone'}
            ];
    }
  return (
    <div className="App">
      <header className="App-header">
        <img src={logo} className="App-logo" alt="logo" />
    <table id="myTable">
    <thead>
        <tr>
            <th>Product Name</th>
            <th>Customer Name</th>
            <th>Sales Amount</th>
            <th>Phone Number</th>
        </tr>
    </thead>
    <tbody>
        <tr>
            <td>HIJ Printer</td>
            <td>Jessica Taylor</td>
            <td>$149.99</td>
            <td>(901) 234-5678</td>
        </tr>
        <tr>
            <td>NOP Router</td>
            <td>Paul Anderson</td>
            <td>$89.99</td>
            <td>(012) 345-6789</td>
        </tr>
    </tbody>
</table>
<p>
    <button onClick={() => quickExcelDownloadFile({id: 'myTable'}, { header: getHeader(), hasHeader: true, isDebug: true})} className={'styled-button'}>Download Excel</button>
</p>
      </header>
    </div>
  );
}

export default App;
  {
    hasHeader: true,
    isDebug: true
  }
Look at Developer Console (in Chrome, right click anywhere on the page -> Inspect -> Console) and see what errors are being thrown and share that with us.
© 2024 Fitch Kitty, LLC. All rights reserved.